SolusVM is a popular control panel for managing VPS hosting. In SolusVM 1, the master/management node controls virtual server nodes and manages VPS instances.
Note: This tutorial is only for SolusVM 1. It does not support latest versions of Linux. In future SolusVM will deprecate v1. So we recommend you to install SolusVM 2 instead.
What are the requirements?
- Fresh AlmaLinux 8, CentOS Stream 8, or CentOS 7 installed on your VPS/Server.
How to install SolusVM 1 Master/Management Node?
Step 1: Log in to SSH as a root account.
For AlmaLinux 8 or CentOS Stream 8, run the following command:
curl -o installer https://files.soluslabs.com/solusvmphp7/install/installer && chmod +x installer && ./installer
For CentOS 7, execute the following one instead:
curl -o install.sh https://files.solusvm.com/install.sh && sh install.sh
We are going to install SolusVM 1 Master/Management node, so we chose option 2.
Enter "2" (without the quotes) and press Enter.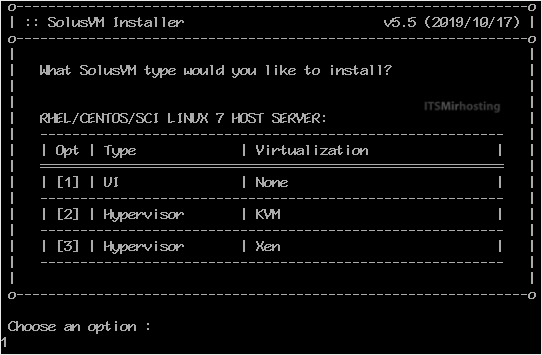
Installation may take from 5 to 10 minutes and will depend on the speed of your server.
Once the installation is complete, it will show you an administrator URL and the username/password for your account.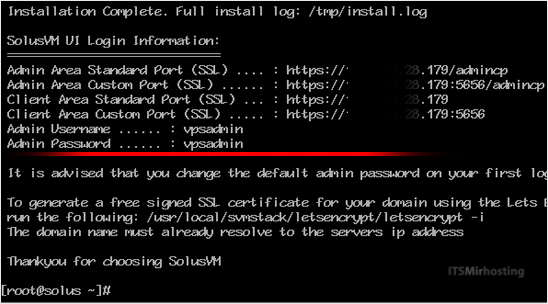
Step 2: You can now access your Administrator control panel. Open your SolusVM 1 Admin URL in the browser and enter your login details.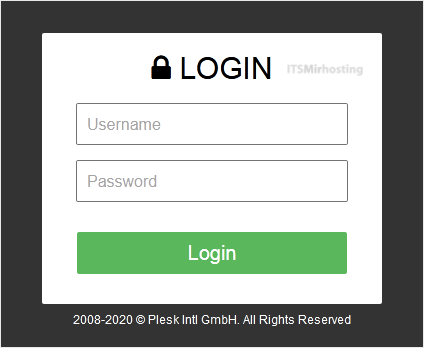
Note: Don't forget to change your default username and password for SolusVM 1. The default username/password is not secure, and it is easy for anyone to access your panel using them.

